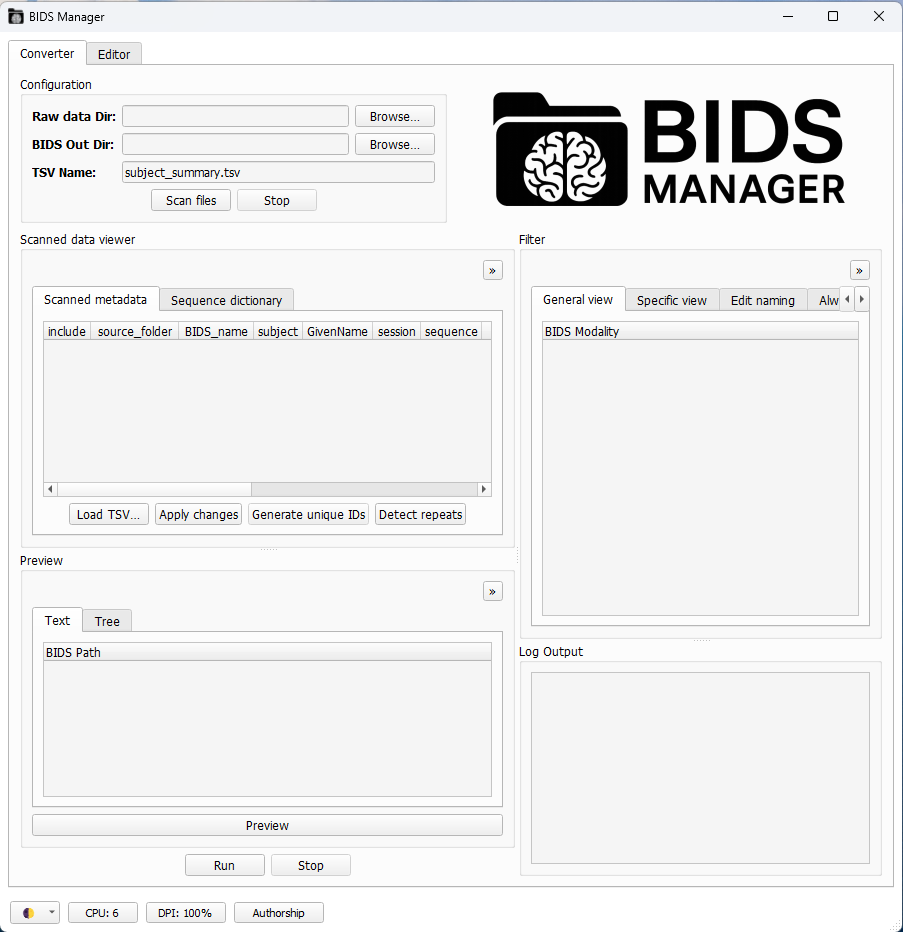
Converter Tab#
The first tab you’ll see in BIDS-Manager is the converter tab. This is where you can scan your raw data, identify different patterns and run the conversion into a BIDS compliant dataset.
Visual settings
You can change the color palette of the GUI with the icon in the lower-left corner. High-contrast themes are also available. This only affect the appearance, it will be saved for future sessions.
The
DPI(dots per inch) setting in the lower-left corner lets you scale the display to match your PC’s resolution. Very high DPI values might give issues, not recommended to be set 50% higher than your PC’s resolution. This only affect the appearance, it will be saved for future sessions.Each section can be undocked by clicking on the
>>icon (top-right corner). Closing the undocked window will dock it back.Each section can be resized by dragging its edges.
The whole GUI can also be resized by dragging from the edges. If you want to make it very small, you can try undocking some sections.
Configuration#
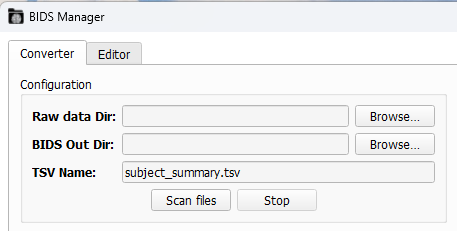
To scan your dataset, first you need to fullfill the Configuration section:
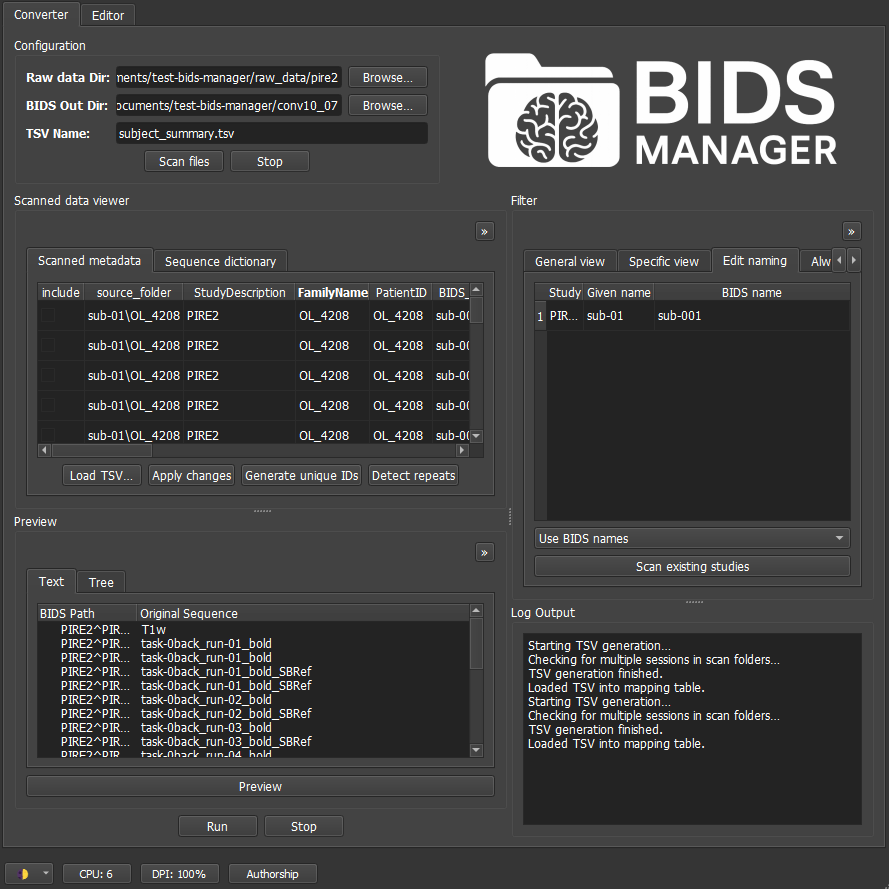
Raw data Dir: You can paste the path or
browseto select your datasets folder. BIDS-Manager can work simulatenusly with datasets from different studies at the same time.BIDS Out Dir: You can paste the path or
browseto select the folder where you want to save the converted output (the BIDS-compliant dataset).TSV Name: Everytime you scan your dataset, you create a .tsv file with a summary of your scanned files and the conversion settings. You can edit the name, but the default is “subject_summary.tsv”.
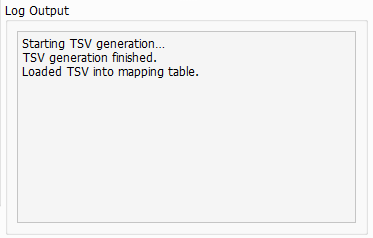
Once you have defined the different configuration parameters, you can press in Scan files. Both the terminal and the Log Output section will show some updates in the process of scanning your dataset and the creation of the TSV file.
Warning
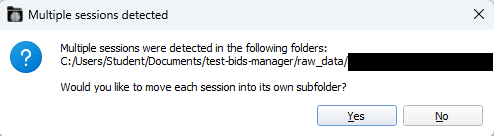
If BIDS-Manager detects more than one participant or sessions in a folder, it will prompt you to move them in its own subfolder. Selecting Yes will re-organize your original folders and create FamilyName, PatientID and correct BIDS name for each subject.
Scanned Data Viewer#
This section is divided in 2 sub-sections:
Scanned metadata
Suffix dictionary
1. Scanned metadata#
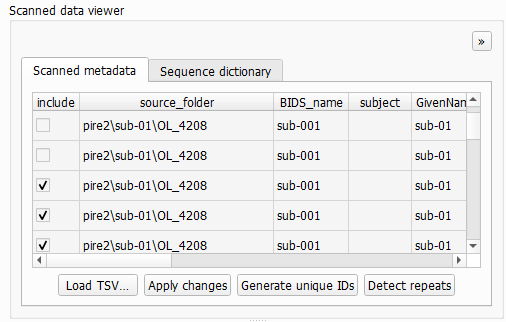
This sections summarizes your uploaded raw data, including subjects, sessions, sequence types and their proposed BIDS conversion.
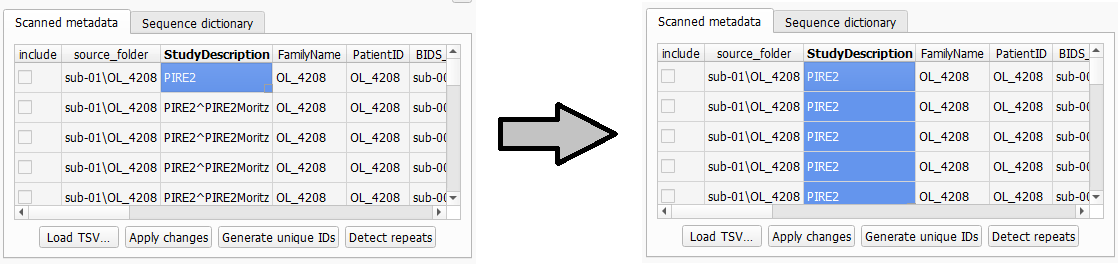
source_folder: Path to the folder that contains this file. The root is the raw-data directory you selected when loading the dataset.StudyDescription: The name of the Study, there can be several in your raw data directory. This becomes the root name in the final BIDS conversion. There can be errors if different machines were used. You can edit it by double-clicking.FamilyName&PatientID: They are often identical. If the experimenter forgot to add or change the IDs between recordings, BIDS-Manager will be able to identify the different subjects. You can edit it manually or click onGenerate unique IDsto assign unique identifiers perFamilyName.BIDS Name: Subject label in the BIDS conversion. Ensure it is consistent after any changes inFamilyNameorPatientID. Also editable.session: Shows the sessions detected in your dataset. If auto-detection fails, edit the values manually.sequence&Proposed BIDS name: The different sequences are classified and given a BIDS name thanks to theSuffix dictionary(see next section).
Conversion tips
You can drag the small square in the lower-left corner of a cell to copy its value vertically to other rows. This works for all editable fields in this section.
Warning: The
includecheckbox allows you to select what to include in the final BIDS conversion, but this is not recommended. Use thefiltersection instead.
Actions#
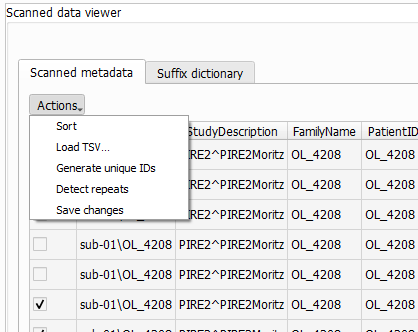
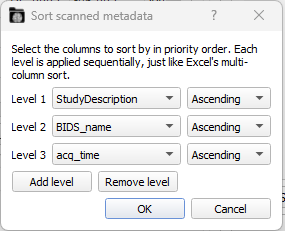
Sort: It allows you to order the metadata table by the selected columns and by ascending or descending order. This is specially useful when you have scanned folders with different studies, subjects or acquisition times.
Load TSV...: lets you reload a dataset by browsing their “subject_summary.tsv”. This skips the scanning process, which can take a lot of time. You still need to set the Raw data Dir and the BIDS Out Dir.Generate unique IDs: BIDS-Manager will be able to identify the different subjects and assign unique identifiers.Detect repeats: therepcolumn will show a 2, which means that this entry is the latest version (common when a run is interrupted and restarted). Sometimes this will be done automatically when you scan the file.Save changes: it updates the TSV file “subject_summary.tsv” with any edits you’ve made.
2. Suffix dictionary#
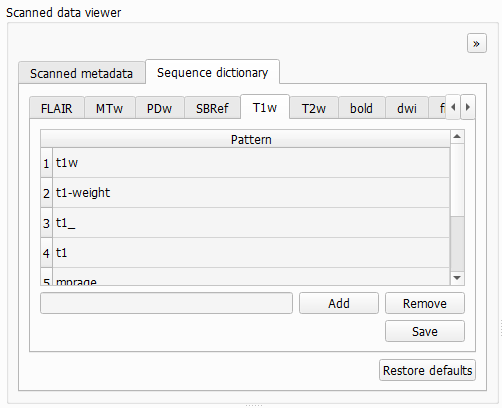
Each tab corresponds to a BIDS sequence type (f.e. dwi) and lists the keywords that BIDS-Manager uses to recognize it (f.e. dti, dwi, diff).
Default patterns: commonly used keywords across laboratories.
Custom patterns: to activate and edit your custom patterns, you need to check the
Use custom suffix patterns. In this section you can add specific naming patterns you use in your own datasets. You just need to write your keyword in the bar below and click onAddorRemoveto erase a keyword orRestore defaultsto erase them all.
Filter#
This section is divided into 4 sub-sections:
General view
Specific view
Edit naming
Always exclude
1. General view#
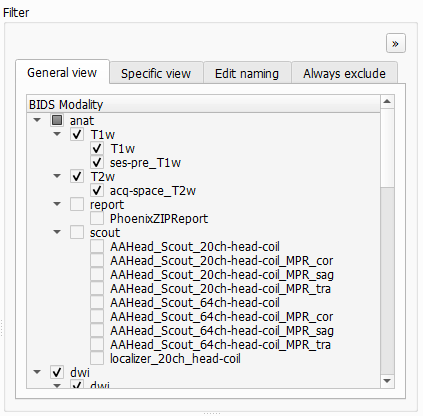
It displays all of the patterns detected in all subjects, organized and classified by BIDS sequence types (anat, func, fmap, dwi..). Under each modality you’ll see the specific types of images and runs that were detected during scanning. You can check and uncheck which ones you want to include in the final BIDS converted dataset.
Repeated sequences
If a sequences shows (rep2) next to its name, it means that it’s a duplicated. This usually represents runs that got interrupted. If you include both, they will be included as run-1 and run-2.
2. Specific view#
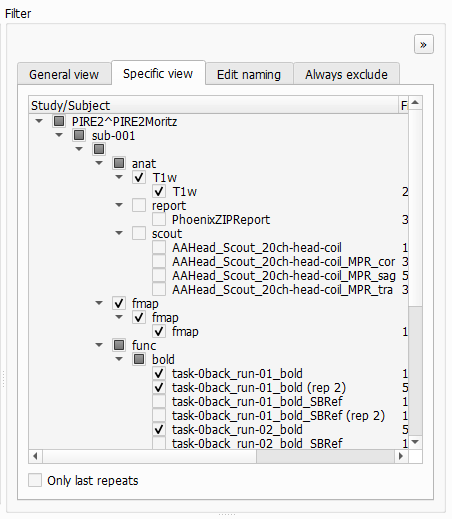
This view is similar to the General view, but you here can select specific files per subject.
Repeated sequencees
The option Only last repeats automatically keeps the most recent version of each duplicate file (rep 2) and deselect the older ones.
Be aware, this might overwrite some changes done in the General view.
3. Edit naming#
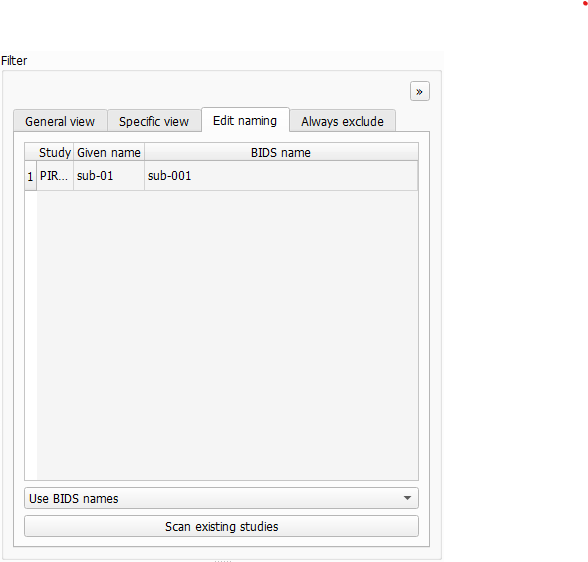
This pannels displays both the BIDS name and the Given Name (e.g. the codeword used during participant recruiting). Use this section to verify that participants are not misassigned. You can also manually modify the BIDS name or the given name if correction are needed. The dropdown lets you choose between Use BIDS name or Use given name.
Warning
Selecting the Given Name option won’t be BIDS compliant.
4. Always exclude#
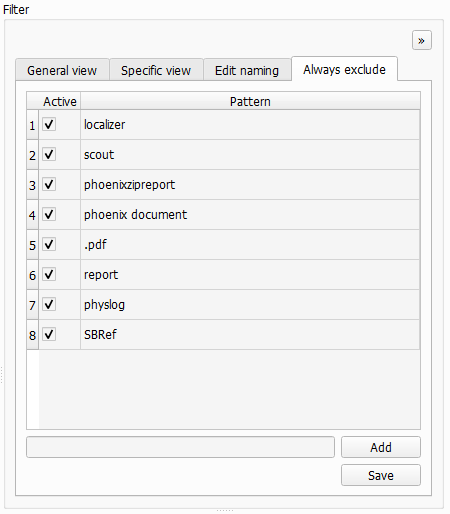
BIDS-Manager has a list of common scan patterns that are usually not necesary and exclude them automatically during scanning. You can add new patterns manually so they won’t be scan in your next session.
All new patterns will be stored in a tsv file within your BIDS-Manager environment:
path/to/BIDS_MANAGER\env\Lib\site-packages\bids_manager\user_preferences
Preview#
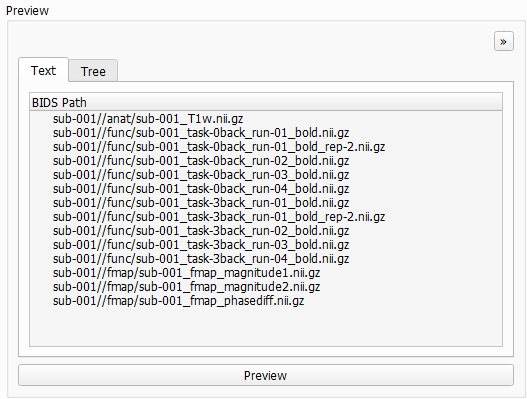
The right side shows the proposed BIDS conversion; the left side shows the original sequence name. You can click on Preview to update it with the most recent modifications done.
There are 2 views:
Text (above): a list of generated file paths.
Tree (below): a hierarchical view organized by subjects, modalities (dwi, anat, func…) and each file with its final BIDS compliant name.
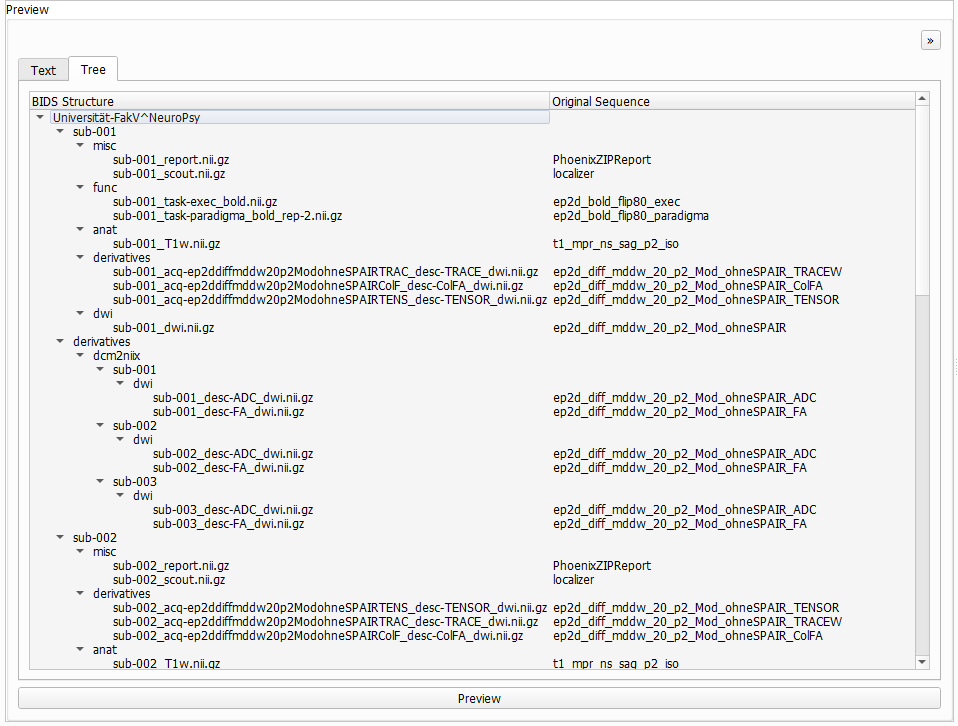
Path names
Sometimes the path names are too long, double click on the top banner to adjust the windows.
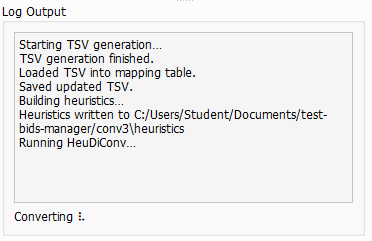
Run conversion#

Finally, once you have chosen your conversion parameters, you can proceed to run the conversion. Click Run to start converting your dataset into a BIDS-compliant structure. The Log Output and the Terminal will provide real-time updates on the progress and any issues encountered.
When the process completes, you will find your converted dataset in the directory specified as the BIDS Output Directory.
Next section
In the next section we will get see how to navigate and edit metadata (json and tsv files) as well as view and scroll through sequence types (nii and gz files) thanks to the Editor Tab.