Installation Guide#
You can install BIDS-Manager by using our installers.
Required dependencies?
The installation method includes all the depencies required to run the GUI and helper scripts. All core requirements are version pinned in pyproject.toml to ensure consistent installations.
Installers#
What does the installer do?
The installer is intended to make the installation process simple and easy, while ensuring every dependency and requierement is installed. So, users don’t need any technical expertise. This is what is happening in the background:
Creates a BIDS_MANAGER folder in you user/home directory.
Downloads a compressed embeded python 3.10 (ensures compatibily). BIDS-Manager will only work in python 3.10. We, will give support to latest python versions in th future.
Decompresses the embeded python.
Ensures that pip library is working correctly.
Creates an environment using the embeded python 3.10
pip install bids-manager in that environment.
Creates shortcut scripts in your desktop to launch or unistall the BIDS_Manager app.
Download the ZIP package: 📦 Installers
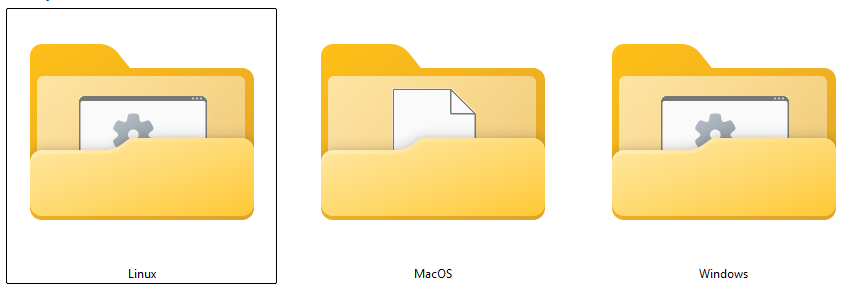
Extract the ZIP file and run the script: After extracting the ZIP, you will see one subfolder per operating system. Each subfolder contains a specific installation script:
OS |
Script |
How to Run |
|---|---|---|
Windows 10/11 |
|
Double-click and |
Linux |
|
Allow execution (see below) and run the installer |
MacOS |
|
Allow execution (see below) and run the installer |
Allow script execution and run the installer for Linux and MacOS users#
Linux systems:#
If you’re working in Linux, you’ll need first to allow the .sh script execution. This can be done in two different ways:
Right click and select “Open terminal here” or open a terminal and use:
cd /path/to/your/installer
Give execute permissions to the installer
chmod +x install_bids_manager.sh
Or alternatively
chmod 755 install_bids_manager.sh
Run the installer
./install_bids_manager.sh
Allow “execute” option in XFCE systems
xfconf-query --channel thunar --property /misc-exec-shell-scripts-by-default --create --type bool --set true
Give execute permissions to the installer
chmod +x install_bids_manager.sh
Or alternatively
chmod 755 install_bids_manager.sh
Run the installer
./install_bids_manager.sh
MacOS systems:#
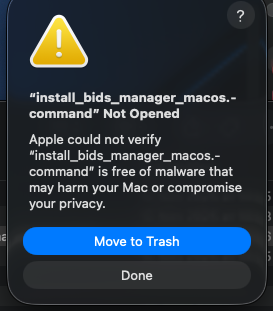
Because the installer is not from the App Store, macOS will initially block it.
Double-click
install_bids_manager.commandwill open a warning ⚠️ dialog. CickDone.
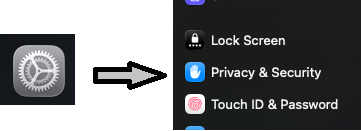
Open
System Settingsand scroll untilPrivacy & Security.
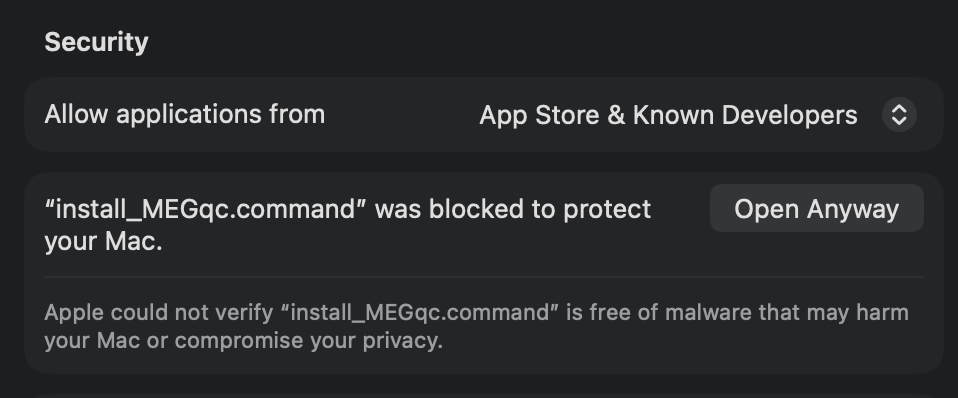
In the
Securitysection, you should now see a mesage about the blocked attempt. ClickOpen Anywaysto allow it.
Installation completed! 🎉#
After the installation finishes, you will find two shortcuts on your desktop:
OS |
Launch |
Uninstall |
|---|---|---|
Windows |
|
|
Linux |
|
|
MacOS |
|
|
To open the app, double click on the launcher.
First time to launch will take a minute. For the next times that you open the app, the initialization will be faster.
To uninstall the app, double click on the uninstall launcher.
Where is BIDS-Manager installed? 🤨#
Installation paths
You can find your BIDS_MANGER installed in the following full paths:
Windows:
C:\Users\<your_user>\BIDS_MANAGER
Linux:
/home/<your_user>/BIDS_MANAGER
MacOS:
/Users/<your_user>/BIDS_MANAGER
What if you don’t like GUIs and want to work with commands in the python environment where BIDS-Manager is installed? 🤨#
Activate the environment#
The installer automatically creates and manages a virtual environment (learn more about virtual environments). If you want to manually activate the environment from a terminal or command prompt you can use the following full paths:
Environment activation full path
Windows:
\Users\<your user>\BIDS_MANAGER\env\Scripts\activate
Linux:
source home/<your user>/BIDS_MANAGER/env/bin/activate
MacOS:
source Users/<your user>/BIDS_MANAGER/env/bin/activate
After activation the following commands become available:
bids-manager– main GUI combining conversion and editing tools (similar to the desktop launcher)dicom-inventory– generatesubject_summary.tsvfrom a DICOM directorybuild-heuristic– create a HeuDiConv heuristic from the TSVrun-heudiconv– run HeuDiConv using the generated heuristicpost-conv-renamer– rename fieldmap files after conversion and organize/write the IntendedFor fields in the metadata